.jpeg)
Wrangling photos into Tableau (with a stopover in serverless functions)
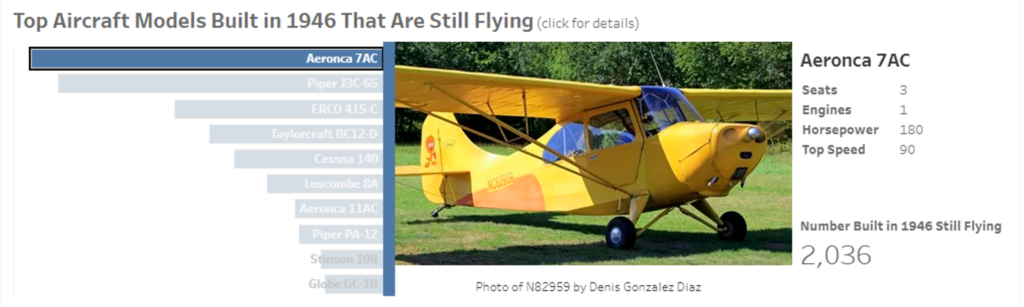
In my last post, I walked through how I built a Tableau Public viz about the amazing number of aircraft built in 1946 that are still flying. This post digs into how I incorporated some nifty aircraft photos into the viz.
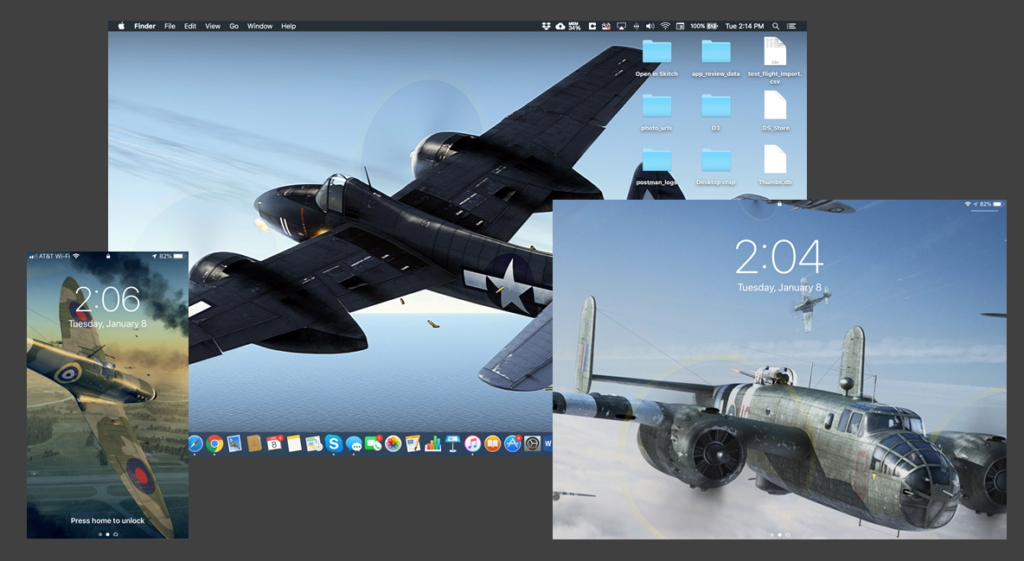
First the underlying question: Why? I mean, of course I love to look at pictures of airplanes. That’s why the wallpaper on my devices looks like this:
But beyond self-indulgence, what value do the photos add to the viz? Data visualization is about creating compelling visuals from data itself. Are photos just eye-candy? Non-data ink? Ben Jones provided one answer in his presentation “Using Data Visualization to Inform and Inspire”: Using powerful imagery increases the memorability of a data visualization.
Beyond memorability, showing photos of the top aircraft models built in 1946 helps convey what made these aircraft so popular. They established the basic form of private aircraft that has defined the category ever since: single-engine, propeller-driven monoplanes that are easy to fly and cheap to mass produce. Despite being more than 70 years old, they don’t look like museum relics. The photos help convey that part of the story. So I envisioned building a little slideshow of images that changes when you click on a chart of the top aircraft models.
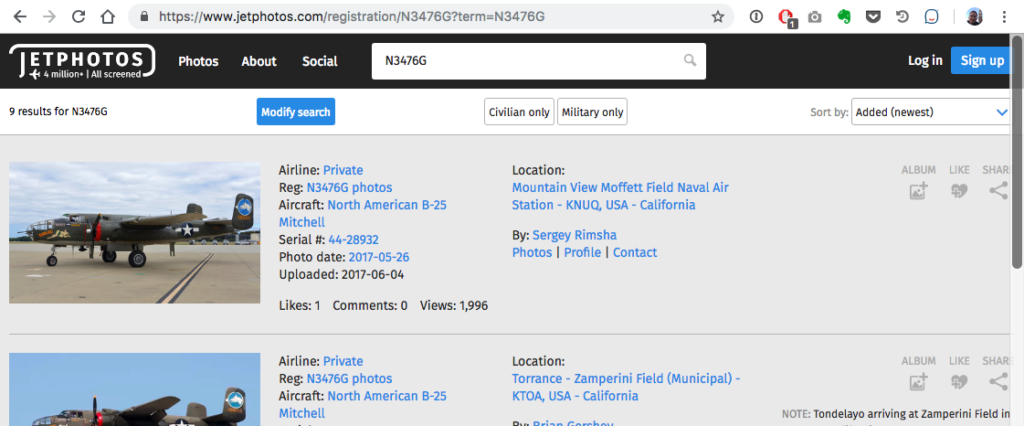
Being an aviation geek, I knew just where to find the photos. JetPhotos.com is a crowd-sourced repository of aircraft photos of all types (not just jets) taken by avid plane-spotting photographers. You can find photos of just about any aircraft if you know its “tail number.”
But how to display the photos as a slideshow in Tableau? This is not really the sort of display that Tableau was designed for. But the Tableau community has always found clever ways to make Tableau jump through all kinds of hoops. The Information Lab has a good overview of the different techniques for adding images to Tableau, but in a nutshell, they are:
- Shapes mark
- Background image
- Image object
- Web Page object
Each has its pros, cons and best uses, but for a data-driven display of multiple large images, Web Page object is the way to go. This allows a dashboard action (i.e. clicking on an aircraft models bar chart) to cause a parameterized URL to display in another section of the dashboard. This has the added benefit of allowing me to display the image files from the JetPhotos.com site, rather than downloading and including the files in my viz.
At first glance, this seemed pretty straightforward. JetPhotos.com doesn’t have a public API for looking up photos, but their URL scheme is relatively transparent. If you know the tail number of a particular aircraft, you can tack it onto a URL to find any photos they have of that plane.
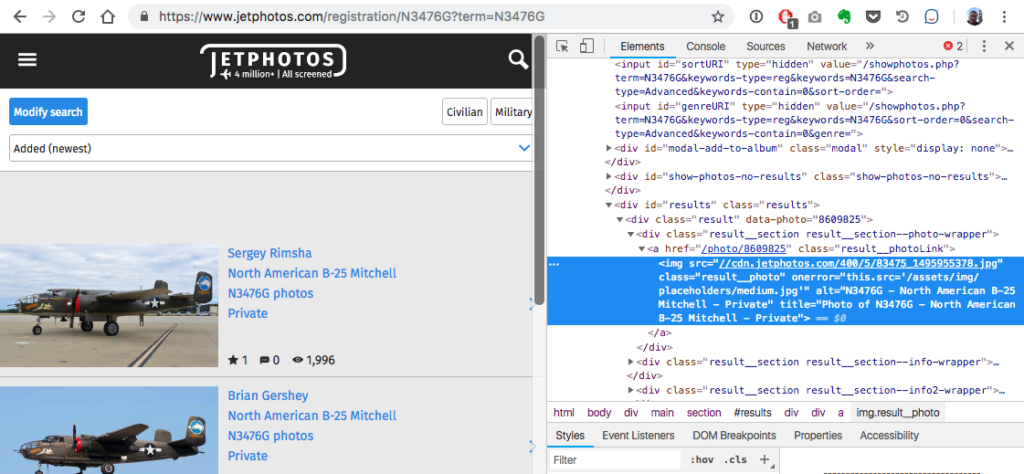
However, this serves up a full web page with a multiple photos and lots of surrounding navigation, rather than a nice clean individual image. Not very pretty in a Tableau dashboard.
Digging through the HTML of the JetPhotos.com pages, I was able to extract individual image URLs, but this presented another problem: Unlike page URLs, the image URLs are cryptic — i.e. not at all derivable based on tail number.
Extracting image URLs based on tail numbers would require some web scraping code.
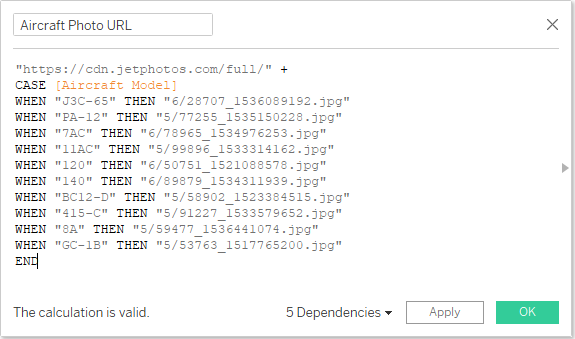
At this point, I decided to punt. To get my viz out the door, I used a temporary hack: I manually looked up 10 images for the 10 aircraft models that I wanted to feature and created a calculated field that returned the appropriate image URL based on aircraft model:
Then I set up a URL Action with a reference to this field as the URL:

That let me publish my viz while I turned my attention to the challenge of automatically looking up photo URLs for any tail number in the FAA database. That’s when things got really interesting!
Automating the Web scraping
Manually looking up photo URLs was fine for a few images, but I wanted a more scalable solution. The viz would be hosted on Tableau Public, so I wanted any click on the top aircraft chart to trigger an image lookup on the fly. To help with this, I consulted my friend and colleague Ian Cole. Together, we wrote up some Node.js code that takes a tail number as a parameter, requests a page from JetPhotos.com, and parses the first image URL out of the HTML. This relies on a pair of NPM packages (Axios and Cheerio) to retrieve the HTML page and extract the image URL from the DOM:
'use strict';
const request = require('axios');
const cheerio = require('cheerio');

module.exports.getjetphoto = async (event, context, callback) => {
  const tailNum = event.tailNum;
  return request(`https://www.jetphotos.com/photo/keyword/${tailNum}`)
    .then(({data}) => {
      const $ = cheerio.load(data);
      const photoElements = $('img.result__photo');
      const photos = [];
      photoElements.each((i, el) => {
        photos.push($(el).attr('src'));
      });
      var html = `<html><img style="max-width: 500px;" src="${photos[0]}"/></html>`;
      context.succeed(html);
    })
    .catch((err) => {
      context.succeed(err.response);
    });
};
We tested the code locally and it worked like a charm.
For hosting this code, we thought this would be a great scenario for a “serverless” function on AWS Lambda — i.e. instead hosting (and paying for) full round-the-clock web hosting, the snippet of code would run on-demand, and we would be charged per request (and only if traffic exceeds AWS’s generous free tier of one million requests per month, which was unlikely).
We also used this as an occasion to try out the Serverless Framework, an open-source project to develop a platform-agnostic interface for all the major cloud providers. Once we set up the appropriate account credentials and permissions on AWS, the framework took care of a lot of the nuts-and-bolts of deploying both a Lambda function and an API Gateway endpoint.
But when we deployed it to AWS, we hit a roadblock: A 403 error and a Captcha security check page:
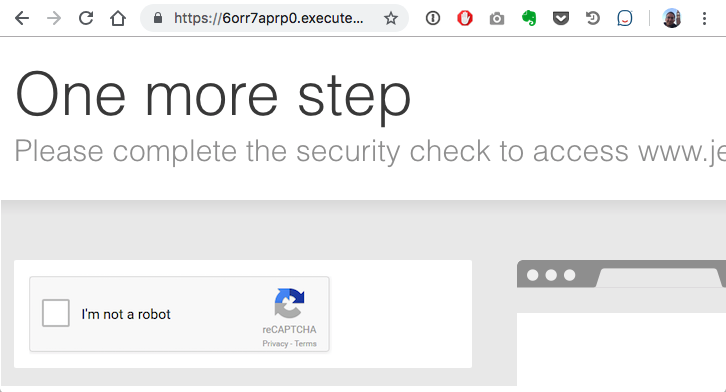
Looked like perhaps JetPhotos.com was blocking AWS IP addresses, probably to prevent bots from extracting all of their photos.
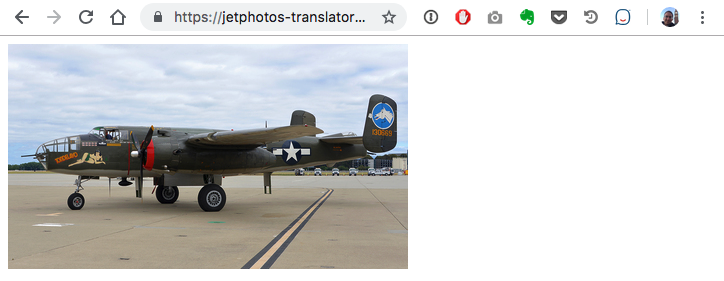
So here was our chance to see if the Serverless Framework lived up to its platform-agnostic goal. If it didn’t work on AWS, maybe it would work on Azure. We found that the Serverless Framework made this easier but not effortless. I’ll go into more details in a follow up post, but bottom line, we deployed to Azure, and it worked! No IP blocking here (for now).
However, there were still a few gotchas with this approach:
- Cold start performance: The beauty of serverless is that you pay only per invocation of your function, not for continually running a server. The downside is that if your function has not been invoked in awhile, there can be a slight lag as the cloud provider re-deploys your function to a server. This is typically less than a second, but in the case of Azure, we found it could be upwards of 30 seconds. Not good!
- Repeatedly reparsing the same pages: In the simplest implementation, every click on the top aircraft models chart would re-request and re-parse the same page, which seemed wasteful and redundant. Yes, we could implement caching of frequent requests, but that starts to get more complex.
- Dealing with missing data: While JetPhoto.com’s photo collection is quite extensive, it by no means covers every tail number in existence. So some tail numbers would display a “no photo” message rather than a nice picture.
This lead to a rethinking of the approach: Instead of parsing URLs on-the-fly, what about pre-fetching a batch of URLs that could be included with the dashboard’s data source? That brings us to the next chapter of the story.
Next stop: Batch mode
Using our web scraping code in batch mode required a bit of adaptation: Reading the tail numbers from a CSV file instead of a command line, and outputting to CSV rather than an HTML page snippet.
The first step was a bit of refactoring. Both modes needed the same HTTP request and HTML parsing code, so it made sense to split that into a retriever module, separate from the differing input and output modes. Here’s a condensed version of how I structured that:
// handler.js
const retriever = require('./retriever.js')

module.exports.getjetphoto = async (event, context, callback) => {
  return retriever.getjetphotos(event.tailNum, (result) => {
    context.succeed(wrapHtml(result[0]))
  })
}

function wrapHtml (photo) {
	// html stuff
}
// retriever.js
const request = require('axios')
const cheerio = require('cheerio')

module.exports.getjetphotos = async (tailNum, callback) => {
  return request(jetPhotosUrl(tailNum))
    .then(({ data }) => {
      callback(extractPhotos(data))
    })
    .catch((err) => {
      callback(err.response)
    })
}

function jetPhotosUrl (tailNum) {
	// jetphotos url stuff
}

function extractPhotos (data) {
	// cheerio stuff
}
This set things up nicely to add a batcher module to handle reading and writing CSVs. This was greatly facilitated by the PapaParse library. But because each call to the retriever is asynchronous (i.e. returns a Promise that is resolved when the async call finishes), I collected all the Promises in an array, then used Promises.all to wait for them all to be resolved before writing the output files:
// batcher.js
const fs = require('fs')
const Papa = require('papaparse')
const retriever = require('./retriever.js')

module.exports.getjetphotobatch = (inputFile = 'tail_numbers.csv', tailNumCol = 'Tail Number') => {
  // use fs and PapaParse read input CSV file
  fs.readFile(inputFile, 'utf8', (err, fileData) => {
    Papa.parse(fileData, {
      complete: (results) => {
        // do some validation

        let aircraftListWithPhotos = results.data.map(row => {
          // build an array of promises that will get resolved when retriever responds
          return new Promise((resolve, reject) => {
            retriever.getjetphotos(row[tailNumCol], (result) => {...}
          }
        })

        // after all promises resolved, write output
        Promise.all(aircraftListWithPhotos).then(aircraftListWithPhotos => {

          // create a log file with all the original rows plus status column
          let aircraftStatusList = ...

          // push all the photo urls rows to a separate array
          let photosUrlList = ...

          // output to CSVs named as the input file plus a suffix
          outputCsv('status', aircraftStatusList)
          outputCsv('photos', photosUrlList)
        })

        const outputCsv = (suffix, data) => {
          // Use PapaParse and fs to output the data to CSVs
        }
      }
    })
  })
}
When this was all ready to go, I discovered another gotcha: Rate limiting! Not surprisingly, any popular website will prevent too many repeated requests from the same source. I wanted to respect that, so after a bit of trial and error, I was able to determine the rate limit threshold (no more than 25 requests every 2 minutes) and adapted the code request small batches, then pause for a cool-down period. The Bottleneck library was a big help here. All I had to do is set up the Bottleneck timing options, then wrap the retriever call in a function that takes care of pausing and resuming accordingly:
// batcher.js
...
const Bottleneck = require('bottleneck')
...

// set up Bottleneck options

let bottleneckRefreshInterval = 100 * 1000 // must be divisible by 250
let bottleneckOptions = {
  maxConcurrent: 1,
  minTime: 200,
  reservoir: 25, // initial value
  reservoirRefreshAmount: 25,
  reservoirRefreshInterval: bottleneckRefreshInterval
}
const limiter = new Bottleneck(bottleneckOptions)

module.exports.getjetphotobatch = (inputFile = 'tail_numbers.csv', tailNumCol = 'Tail Number') => {

	// all the same csv parsing and item iterating here

	// wrap the retriever call with limiter.submit(). Bottleneck takes care of the rest!
	limiter.submit(
		retriever.getjetphotos, tailNum, (result) => {...}
	)

}
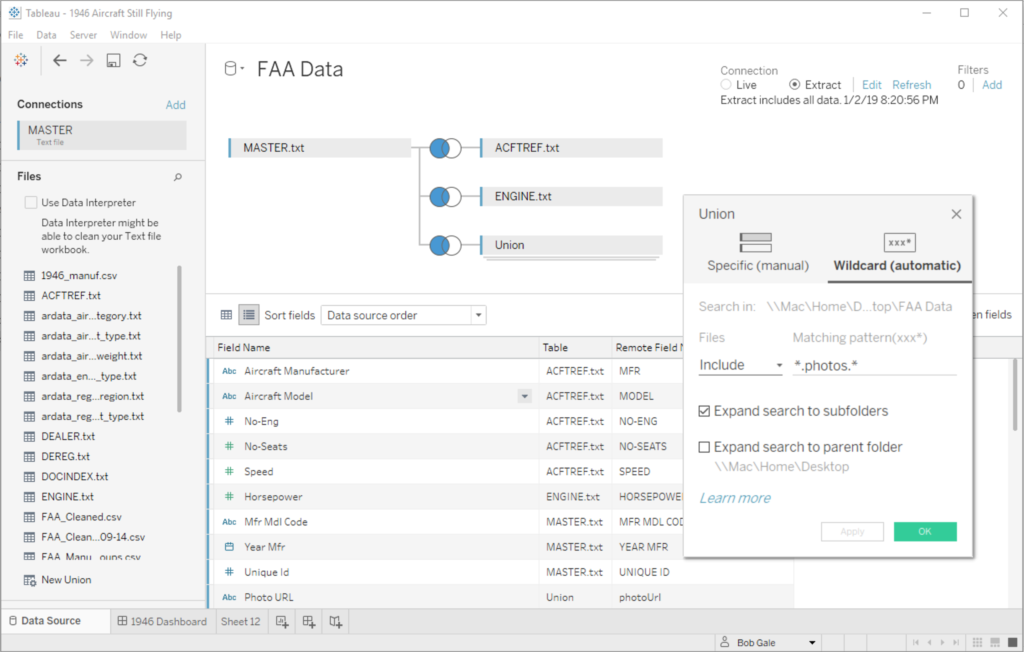
So with the batch mode working, I was able to collect almost 400 photo URLs for the 10 aircraft models that I was featuring in my viz. Each aircraft model’s photos were in a separate CSV, so back in Tableau I joined them with the my aircraft data using a wildcard union:
This also gave me the option of displaying multiple photos per aircraft model — i.e. potentially every tail number of that model in the JetPhotos collection. I played with a few ideas for choosing the “best” photo of each model, but settled on a simpler scheme of choosing the newest (which conveniently was the highest ID number).
As a final touch, I wanted to display not only the aircraft image, but also the tail number and photographer’s name in a caption. So I modified the web scraping code to read the photographer’s name as well as the URL, then used another dashboard action to display that as a caption below the photo.
In the end, I was able to populate my viz with a nice slideshow of aircraft photos, explore a number of possible solutions, and produce some versatile aircraft photo retrieval code that I can use for future aviation vizes. All the resulting code is on GitHub if you want to explore it in more detail.